Understanding Tampos on Diecast Cars
Diecast cars are beloved by collectors and hobbyists for their intricate details and realistic designs. A significant part of this detailing comes from tampos. Tampos are essentially the printed designs, logos, and markings applied directly onto the surface of diecast models. These can range from simple stripes to complex manufacturer logos and intricate graphics that replicate the look of the real car. While tampos enhance the aesthetic appeal of these models, there are times when you might want to remove them for various reasons, such as customization, restoration, or simply because the existing tampos are damaged. Understanding what tampos are and why they are sometimes removed is the first step in successful removal.
What Are Tampos and Why Remove Them?
Tampos are applied using a pad printing process. A silicone pad picks up the ink from an etched plate and transfers it onto the model’s surface. The process allows for high-precision printing on various surfaces, including curved and uneven areas, which is why it is so common in diecast car production. But why would you want to remove them? Often, people want to customize their models by repainting or adding custom graphics. Restoration projects also often involve removing tampos if they are faded, cracked, or otherwise damaged. Collectors may also want to strip tampos to achieve a cleaner look, perhaps for a specific era or style.
Tools and Materials Needed
Before you start removing tampos from your diecast cars, it is essential to gather the right tools and materials. Having everything ready will streamline the process and help you achieve better results. Different methods require different supplies, so assess your chosen technique and gather the necessary items. Remember, patience and care are key. Rushing the process can lead to damage to the paint or the model itself. Taking the time to prepare and work methodically will greatly increase your chances of a successful outcome. Here is a list of what you’ll need:
Essential Supplies for Tampos Removal
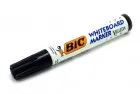
- Chemical Stripper (e.g., isopropyl alcohol, denatured alcohol, or specialized tampos removers)
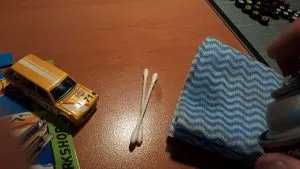
- Cotton swabs or soft cloths
- Heat gun or hairdryer (for heat method)
- Plastic scraper or toothpick (for mechanical method)
- Precision knife or hobby knife
- Protective gloves and eyewear
- Ventilated workspace
- Clean water and mild soap
- Wax or polishing compound (optional)
Safety Precautions
Safety should always be your top priority when working with chemicals and heat. Always work in a well-ventilated area to avoid inhaling fumes. Wear protective gloves to prevent skin contact with chemicals, and protect your eyes with safety glasses. If using a heat gun, be extremely careful to avoid burning yourself or damaging the model. Keep a fire extinguisher nearby as a precaution. Always read and follow the manufacturer’s instructions for any chemicals you use. If you are unsure about any step, it is best to seek guidance from experienced modelers or test the method on a less valuable model before attempting it on a prized piece.
Step-by-Step Guide to Tampos Removal

There are several methods you can use to remove tampos, each with its advantages and disadvantages. The best method depends on the type of tampos, the materials of your diecast car, and the tools you have available. Here are three common methods, along with detailed instructions. Always start with the least aggressive method and work your way up to more powerful techniques only if necessary. Consider testing each method on a less valuable model or a small, inconspicuous area of the model to ensure you understand how it works and to check for any adverse reactions.
Prepare the Diecast Car
Before you start, clean the diecast car to remove any dust, dirt, or oils that could interfere with the removal process. Use a soft cloth or cotton swab with mild soap and water. Allow the car to dry completely before proceeding. This step ensures that the methods you use will work effectively and that you get a clean surface. Also, prepare your workspace by covering the surface with newspaper or a protective mat to prevent spills and protect your work area. Lay out all your tools and materials, so they are readily available.
Method 1 Using Chemicals
Chemicals, such as isopropyl alcohol or specialized tampos removers, can effectively dissolve the ink of tampos. This method is often the gentlest and can be used without damaging the underlying paint, provided you use the correct chemicals and follow the instructions carefully. Test the chosen chemical on a small, inconspicuous area of the model to check for any adverse effects on the paint. Some older models may have paints that react with certain chemicals. This test helps avoid a disastrous result on the entire model. This is often the safest and most common method.
Applying the Chemical

Dip a cotton swab or soft cloth into the chemical solution. Gently apply the solution to the tampos, ensuring the entire design is covered. Avoid applying too much liquid, as this could cause it to run and affect other areas of the model. Let the chemical sit for a short period, following the manufacturer’s instructions or testing it at intervals of a few minutes to see how the tampos react. Do not let the chemical sit for too long, as it could start to affect the underlying paint.
Removing the Tampos
Once the tampos begin to soften or lift, gently rub them with a cotton swab or soft cloth. Use light pressure to avoid scratching the paint. The tampos should start to come off easily. If the tampos are stubborn, reapply the chemical and allow it to sit for a bit longer. Continue wiping until all traces of the tampos are removed. If there is any residue, gently wipe the area with a clean cloth and the chemical solution. After you have removed the tampos, wash the car with mild soap and water and let it dry completely.
Method 2 Using Heat
Heat can soften the adhesive of the tampos, making it easier to remove them. This method requires caution to avoid damaging the paint. A heat gun or hairdryer can be used, but always use the lowest setting and maintain a safe distance from the model. The heat method is particularly useful for models where the tampos are firmly adhered. Always test this method on a small, inconspicuous area first to ensure it does not damage the paint. Heat can be very effective, but too much can cause the paint to blister or even melt.
Applying Heat

Hold the heat gun or hairdryer a few inches away from the model. Apply heat evenly to the tampos, moving the heat source constantly to prevent overheating a single spot. Heat the area for a short period, checking the surface frequently. The tampos should begin to soften as the adhesive is loosened. Be careful not to overheat the plastic or any other parts of the model, as this can cause irreversible damage. If you see any signs of bubbling or melting, immediately stop heating and let the model cool down.
Removing the Tampos
Once the tampos are soft, use a plastic scraper or toothpick to gently lift them from the surface. Work slowly and carefully, peeling them off. Avoid using metal tools, as they can scratch the paint. If the tampos do not come off easily, reapply heat for a slightly longer period. Continue this process until all tampos are removed. After removing the tampos, clean the area with a soft cloth or cotton swab. If there is any adhesive residue, use a small amount of isopropyl alcohol to remove it.
Method 3 Using Mechanical Methods
Mechanical methods involve physically removing the tampos. This often uses scraping or abrasion. This method can be more aggressive and potentially cause damage to the paint if not done carefully. It is suitable for models with old, brittle tampos or when other methods have failed. This method often requires the most skill and should be approached with caution. Always work slowly and use the appropriate tools. This is often the most aggressive method but can be very effective.
Applying the Mechanical Method

Use a plastic scraper or toothpick to gently lift the edges of the tampos. Start at a corner or edge and work your way inwards. Avoid using excessive force, as this can scratch the paint. A hobby knife can also be used to carefully lift the edges, but be extremely cautious to avoid cutting into the model. If the tampos are stubborn, you can try a combination of methods. You can use heat to soften the adhesive and then use the scraper to remove the tampos. This can make the process easier and reduce the risk of paint damage. Work slowly, making sure you have the right tools and take your time.
Removing the Tampos
Once the edges are lifted, carefully scrape the tampos off the surface. Use a gentle, consistent motion. Be patient, and take your time. Avoid pressing too hard, as this can damage the paint. If you are using a hobby knife, use a light touch and angle the blade away from the model to avoid scratching the paint. Continue removing the tampos until all traces are gone. After removal, clean the area with a soft cloth and a small amount of isopropyl alcohol to remove any remaining residue or adhesive. Clean the area thoroughly after removing the tampos.
Cleaning and Finishing Touches
After removing the tampos, you will need to clean the model and possibly apply a finishing touch to restore the original look. The goal is to ensure a clean, smooth surface. Always use soft cloths and gentle cleaning solutions to avoid damaging the paint or the model. The final steps are crucial for achieving a professional finish, whether you intend to repaint the model or keep the original paint job.
Cleaning Residue

After removing the tampos, there is often residue left behind. This residue could be adhesive from the tampos or small remnants of ink. Use a soft cloth dampened with isopropyl alcohol to remove any remaining adhesive or ink. Gently rub the surface until the residue is gone. For stubborn residue, you might need to use a bit more pressure, but always be careful not to scratch the paint. After cleaning, dry the area thoroughly with a clean, soft cloth.
Waxing or Polishing
Once the model is clean and dry, you can optionally wax or polish it to protect the paint and restore its shine. Apply a small amount of wax or polish to a soft cloth and gently rub it onto the model’s surface in a circular motion. Follow the instructions on the product label for proper application. After applying the wax or polish, let it dry and then buff the surface with a clean, soft cloth to remove any residue and reveal a brilliant shine. This step will give your model a professional, polished finish.
Potential Problems and Solutions
Even with the best techniques, you might encounter some issues. Understanding common problems and knowing how to solve them can save you from frustration and prevent damage to your models. Always proceed carefully and be prepared to adjust your approach if necessary. Patience is key. If you are unsure about any step, it is always best to consult with experienced modelers.
Damage to Paint
One of the most common problems is accidentally damaging the paint during the removal process. This can happen if you use too much force, the wrong tools, or aggressive chemicals. To avoid this, always test your chosen method on a less visible area of the model first. Use gentle techniques, and avoid sharp tools that can scratch the paint. If you do damage the paint, you might be able to touch it up with matching paint or consider a full repaint if the damage is extensive. Taking your time and working carefully will help you avoid these issues.
Chemical Reactions
Some chemicals can react with the paint, causing it to bubble, soften, or even dissolve. This is why it is essential to test your chemicals on a small, inconspicuous area before applying them to the entire model. If you notice any adverse reactions, immediately stop using the chemical and try a different method. Ensure you are using the correct chemical for the model’s paint type. Some older models may have paints that are more susceptible to chemical damage. If you are unsure, consult with other modelers or experts to determine the best approach.
Conclusion
Removing tampos from diecast cars can be a rewarding process, whether for restoration, customization, or a cleaner look. By understanding the techniques and materials, and by taking care and patience, you can successfully remove tampos without damaging your models. Always remember to prioritize safety, work in a well-ventilated area, and test your methods on a less valuable model before applying them to your prized pieces. With the right approach, you can transform your diecast cars and bring them closer to your desired vision. Happy modeling!